
Collection: Blagdon Damselfly - Preformed Pond

-
Blagdon Damselfly 500 - Indestructa Preformed Pond
SpecialRegular price £229.99Regular price Blagdon Damselfly 750 - Indestructa Preformed Pond
SpecialRegular price £284.99Regular priceBlagdon Damselfly 1250 - Indestructa Preformed Pond
SpecialRegular price £449.99Regular price£489.99Sale price £449.99Special


Blagdon Damselfly - Preformed Pond
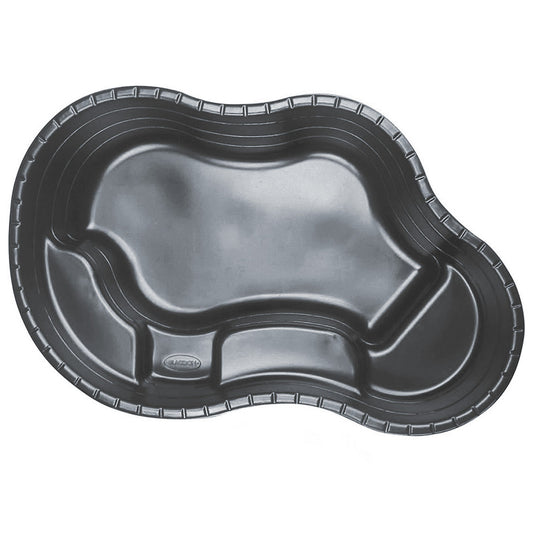
Blagdon Damselfly Indestructa preformed ponds incorporate spacious shelving designed to accommodate the majority of planting basket shapes. This enables easy planting giving that natural pond look. All Indestructa ponds are ideal for fish and wildlife, are easy to install and are available in a variety of styles with volumes ranging from 500 litres to 1250 litres.
Blagdon Damselfly Indestructa preformed ponds are made from 3mm thick high quality HDPE, are exceptionally durable and backed by Blagdon's lifetime commitment to quality guarantee.
| Model | Size cm | Litres | ||
| Length | Width | Depth | ||
| Damselfly 500 | 179 | 114 | 48 | 500 L |
| Damselfly 750 | 204 | 131 | 53 | 750 L |
| Damselfly 1250 | 246 | 157 | 61 | 1250 L |
Lifetime Anti-Perforation Guarantee
The Blagdon Damselfly - Preformed Pond are covered by a lifetime anti-perforation guarantee which is valid in the event of faulty workmanship or materials. Proof of purchase must be returned, with the pond, to the point of purchase. Perforation due to incorrect installation will invalidate the guarantee, and no liability can be accepted, under any circumstances, for consequential losses or costs. Your statutory rights remain unaffected.
Easy step-by-step Preformed Pond installation guide

1. Location
The ideal pond location is away from deciduous trees and conifers and has ap- proximately 4 - 6 hours of sunlight daily.

2. Tools
For installation you require: Spade, shovel, filler sand, level, yardstick, and a garden hose with water connection.

3. Marking
First, position the preformed pond in the desired location, then mark the contours with sand.

4. Deep zones
The different deep zones are also marked with sand incrementally.

5. Excavation
Generously dig out the specific zones of the garden pond.

6. First test
Then insert the preformed pond to see how it fits.

7. Fill-in
Adjust the different excavated levels with filler sand to compensate unevenness.

8. Levelling
The floor and the pool are levelled out in length and width.

9. Backfilling
Once levelled, the pond should be filled to around 150mm with water, and then all around the perimeter wet sand should be used to backfill to the same level as the water, ensuring the sand fills all cavities. This should then be repeated until the pond is fully supported

10. Filling and compensating
In the final step, the area around the pre- formed pond is adapted to the preformed pond with sand, soil, gravel, etc.

11. Edge area décor
Now you can start planting and designing the pond. Ensure that you completely fill the perimeter bank zone with gravel.

That’s it!
Ask a question
If you need to ask a question about Blagdon Damselfly - Preformed Pond you can do so here.